Washing your car seems simple, right? A bucket, a sponge, some soap, and you’re good to go. But what if that “simple” process is slowly dulling your paint, creating microscopic scratches, and setting the stage for rust and decay? The truth is, there’s a world of difference between merely getting the dirt off and washing your car the right way. Doing it correctly not only produces a jaw-dropping, showroom-quality shine but also acts as the single most crucial piece of maintenance for preserving your vehicle’s value and appearance.
Think of your car’s paint as its skin. It’s a multi-layered, surprisingly delicate surface constantly under assault from road grime, acidic bird droppings, bug splatters, corrosive salt, and the relentless bombardment of UV rays. Washing it improperly—using the wrong soap, a gritty sponge, or a single bucket—is like exfoliating with sandpaper. You might remove the surface-level dirt, but you’re inflicting thousands of tiny scratches, known as swirl marks, that refract light and rob your paint of its depth and gloss.
This is not just about aesthetics; it’s about protection and investment. A properly maintained finish protects the metal underneath from the elements, preventing rust and corrosion that can lead to expensive repairs. Furthermore, a vehicle with a pristine, well-cared-for exterior will always command a higher resale value.
In this ultimate, comprehensive guide, we will move beyond the splash-and-dash and delve into the proven methods used by professional detailers. We will demystify the science behind a scratch-free wash, equip you with the right knowledge and techniques, and guide you step-by-step through a process that guarantees a safer, more effective, and brilliantly satisfying clean. Forget everything you thought you knew and get ready to learn how to wash your car the right way—transforming a routine chore into an act of precision care that will keep your vehicle looking brand new for years to come.
Pre Wash Preparations Setting the Stage for a Flawless Finish
Before a single drop of soapy water touches your car, the most critical phase of the car wash begins. Proper preparation is the bedrock of a scratch-free wash. Rushing this stage is like building a house on a shaky foundation—the end result will inevitably be flawed. Here, we’ll cover the essential groundwork: choosing the right location, understanding the “why” behind your timing, and assembling the perfect car care toolkit.
Choosing Your Battlefield: Location and Timing are Everything
Where and when you wash your car are just as important as how you wash it. Ignoring these environmental factors is one of the most common mistakes amateurs make, leading to frustrating results like water spots and streaks.
Expert Insight: The Shade is Your Best Friend
Never wash your car in direct sunlight or when the surface is hot to the touch.[1][2] The heat causes water and soap to evaporate too quickly, leaving behind stubborn mineral deposits (water spots) and soap residue that can be difficult to remove and can even etch into the paint over time.
- Optimal Timing: Aim to wash your vehicle in the early morning or late evening when the sun is less intense. An overcast day is ideal.
- Location, Location, Location: If possible, wash your car in a shaded area like a garage, carport, or under a large tree. This keeps the surface cool and gives you control over the drying process.
Assembling Your Arsenal: The Essential Car Wash Toolkit
Using the right tools is non-negotiable for a professional-grade wash. Household items like dish soap, old t-shirts, and bath towels are your paint’s worst enemies and must be avoided at all costs. Here’s a checklist of what you’ll need and why each item is crucial.
The Heart of the Method: The Two-Bucket System
If you learn only one thing from this guide, let it be the Two-Bucket Method. This technique is the cornerstone of preventing scratches.
- Two 3- to 5-Gallon Buckets: One will be for your soapy car wash solution (the “Wash Bucket”), and the other will be filled with plain, clean water for rinsing your wash mitt (the “Rinse Bucket”).
- Grit Guards: This simple, yet ingenious, device sits at the bottom of your buckets. A grit guard is a plastic grid that acts as a barrier, trapping the dirt and grit from your wash mitt at the bottom of the bucket and preventing it from being stirred up and reintroduced to your mitt. This dramatically reduces the risk of dragging abrasive particles across your paint.
The Right Lather: Soaps and Cleaners
The cleaning agents you choose will determine how effectively and safely dirt is lifted from the surface.
- pH-Balanced Car Wash Soap: Dish soap is formulated to strip grease and oil, which is exactly what the protective wax and sealant on your car are made of. Using it will strip this vital protective layer, leaving your paint vulnerable. A dedicated, pH-balanced car wash shampoo is designed to gently remove dirt and grime while preserving your car’s wax coating.
- Dedicated Wheel & Tire Cleaner: The grime on your wheels contains abrasive brake dust and metallic particles. A specialized wheel cleaner is formulated to break down this tough contamination effectively. Using a separate cleaner prevents cross-contamination.
- Bug & Tar Remover (Optional): For stubborn, baked-on contaminants, a dedicated bug and tar remover can dissolve them chemically, reducing the need for excessive scrubbing.
The Gentle Touch: Wash Mitts and Brushes
The material that physically touches your car’s paint matters immensely.
- Microfiber or Lambswool Wash Mitt: Ditch the old sponges. Sponges trap dirt particles in their pores and then drag them across the paint, acting like a piece of sandpaper. A high-quality microfiber wash mitt or a soft lambswool mitt features deep piles that pull dirt away from the surface, trapping the particles deep within the fibers and away from your paint.
- Soft-Bristled Wheel Brushes: You’ll need various brushes to safely clean the intricate parts of your wheels and tires without scratching the finish.This includes a larger brush for the tires, a smaller one for the wheel faces, and a long-handled brush for the wheel barrels.
The Final Step: Drying Media
Letting your car air dry is a recipe for water spots. Proper drying is the final touch for a perfect finish.
- High-Quality Microfiber Drying Towels: The best choice for drying is a large, plush, dedicated microfiber drying towel.[19][20][21] Look for waffle-weave or twisted-loop designs, as they are incredibly absorbent and will pull water from the surface with minimal friction.[22]
- Car Dryer / Leaf Blower (Optional): For a truly touch-free drying experience, using a dedicated car dryer or even a leaf blower is an excellent method.[21][23][24] It allows you to blast water out of crevices, mirrors, and trim pieces where it tends to hide and cause drip marks later.[21]
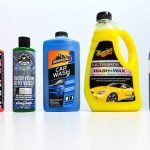
Product Recommendation Table: Your Starter Toolkit
| Category | Product Type | Why It’s Essential |
| Washing | Two 5-Gallon Buckets with Grit Guards | Separates clean and dirty water to prevent scratches.[7][11] |
| pH-Neutral Car Wash Shampoo | Cleans effectively without stripping wax or sealant.[2][25] | |
| Cleaning Tools | Microfiber Wash Mitt | Lifts and traps dirt away from paint, unlike abrasive sponges.[2] |
| Dedicated Wheel Cleaner & Brushes | Safely removes harsh brake dust without damaging wheels.[9] | |
| Drying | Plush Microfiber Drying Towel | Absorbs large amounts of water safely to prevent spots and streaks.[20] |
With your location set and your tools ready, you are now prepared to begin the wash process itself, confident that you have laid the groundwork for a stunning, scratch-free result.
Part 2: The Main Event – The Professional Step-by-Step Washing Process
This is where technique and precision come together. By following a specific order of operations, you ensure that dirt is managed effectively, contamination is minimized, and every part of your car receives the right level of attention. We will now walk through the definitive, professional-approved method for washing your vehicle.
Step 1: Wheels and Tires First – The Golden Rule
Expert Insight: Always start with the wheels and tires.[4][17][26] This area is typically the dirtiest part of the car, laden with brake dust, road grime, and oils.[16] Washing them first prevents you from splashing this heavy contamination onto your freshly cleaned body panels.[2][11] You should use a separate set of brushes and, ideally, a separate wash bucket for this task to avoid cross-contamination.
- Rinse Thoroughly: Start by rinsing the wheel, tire, and wheel well with a strong stream of water from your hose or pressure washer to knock off loose debris.[6]
- Apply Wheel Cleaner: Spray your dedicated wheel cleaner liberally onto the wheel surface. Be sure to use a cleaner that is safe for your specific wheel finish (e.g., painted, chrome, polished aluminum).
- Agitate and Scrub: Use your various brushes to agitate the cleaner.
- Rinse Clean: Rinse the entire wheel and tire meticulously, ensuring all cleaner residue is washed away.
- Repeat: Repeat this process for the other three wheels.
Step 2: The Pre-Rinse – Removing the Heavy Artillery
Before you touch the paint with a wash mitt, you must remove as much loose dirt and grit as possible.[12] Skipping this step means you are essentially grinding that loose dirt into the paint as you wash.[2][12]
- Top-Down Approach: Using your hose or pressure washer, thoroughly rinse the entire car, starting from the roof and working your way down.[10][18] Gravity is your friend; let it help you pull the dirt downwards and off the vehicle.[12]
- Pay Attention to Gaps: Make sure to spray into panel gaps, the front grille, and other areas where dirt accumulates.
Step 3: The Two-Bucket Hand Wash – A Symphony of Suds
Now it’s time to apply soap to the paint using the celebrated Two-Bucket Method.[7][8]
- Prepare Your Buckets:
- The Wash Process (Panel by Panel):
- Load the Mitt: Dunk your clean microfiber wash mitt into the soapy Wash Bucket.[11]
- Wash Top-Down: Start with the roof of the car.[6][7] Gently glide the mitt over the surface in straight, overlapping lines—not circular motions.[3][7][17] Circular washing is a primary cause of swirl marks.[3][10] Let the suds and the mitt do the work; there is no need to apply heavy pressure.
- Rinse the Mitt: After washing a single panel (e.g., the roof, the hood, or one door), do not put the mitt back into the soap bucket. Instead, dunk it into the clean water Rinse Bucket.[7][28] Rub the mitt against the grit guard at the bottom to dislodge all the collected dirt and grit.[11][29]
- Reload with Soap: Once the mitt is clean, wring it out and then return it to the soapy Wash Bucket to pick up fresh suds for the next panel.[8][29]
- Repeat: Continue this process—wash one panel, rinse the mitt, reload with soap—until the entire car is clean. Always work from the top down, saving the dirtiest lower sections (rocker panels, lower doors) for last.[7][23]
Pro Tip: Use multiple wash mitts. Have one mitt for the upper, cleaner two-thirds of the car and a separate mitt for the much dirtier lower third to further reduce the risk of cross-contamination.
Step 4: The Final Rinse – Ensuring a Clean Slate
Once the entire vehicle has been washed, it’s time for the final rinse.
- Top-Down Again: Rinse the car thoroughly from top to bottom, making sure all soap residue is gone.[28][30]
- The “Sheeting” Method: For the final pass, remove the nozzle from your hose and let a gentle stream of free-flowing water cascade over the surfaces. This technique, known as sheeting, encourages the water to run off in large sheets rather than beading up, which can reduce the amount of water left on the surface and make drying easier.
By following this meticulous, step-by-step process, you have safely removed all the dirt and grime without inflicting damage on your paint. Your car is now perfectly clean and ready for the crucial final stage: drying.
Part 3: The Finishing Touches – Drying and Protecting Your Masterpiece
You’ve done the hard work of washing your car safely, but the job isn’t finished yet. The drying and protection phase is what separates a good wash from a professional detail. Improper drying can undo all your careful work by creating water spots and scratches, while skipping protection leaves your pristine paint vulnerable to the elements.
The Art of a Scratch-Free Dry
Letting a car air dry is a cardinal sin in detailing. As water evaporates, it leaves behind mineral deposits that create stubborn water spots.[1][19] These spots can etch into the clear coat over time, requiring polishing to remove. The goal is to remove all the water from the surface as gently and efficiently as possible.
Method 1: The Microfiber Towel Technique
This is the most common and accessible method. The key is using the right towel and the right technique.[20]
- Use a High-Quality Drying Towel: A large, plush microfiber towel designed for drying is a must.[19][20] Its high absorbency wicks water away instead of just pushing it around.
- The Blotting or Dragging Method:
- Blotting: Lay the towel flat over a section of the car (like the hood) and gently pat it down. Lift the towel, wring it out if necessary, and move to the next section.[19] This is the gentlest method, as it minimizes friction.
- Dragging: Lay the towel out and gently pull it across the surface towards you. The weight of the water-soaked towel is usually enough to pick up the moisture without applying pressure.
- Work from Top to Bottom: Just like washing, start with the glass and upper panels and work your way down.[19]
- Use a Drying Aid (Optional but Recommended): A drying aid is a spray product (like a quick detailer or a dedicated drying lubricant) that you lightly mist onto the wet surface before drying.[19][24] This adds lubrication, drastically reducing the risk of scratching, and often adds a bit of gloss and protection.[19]
Method 2: The Touchless Air Dryer Method
For the ultimate in safety, nothing beats drying your car without touching it.
- Use a Car Blower or Leaf Blower: A dedicated car dryer provides filtered, warm air, but a standard leaf blower also works exceptionally well.[21][24]
- Blow Water Off Systematically: Start at the top and work your way down, pushing the majority of the water off the large panels.
- Clear Trapped Water: The biggest advantage of a blower is its ability to blast water out of places towels can’t reach: mirror housings, grilles, panel gaps, lug nut holes, and emblems.[19][21] This prevents annoying drips that can ruin your perfect finish later.
- Final Touch-Up: Use a soft microfiber towel to gently blot any remaining small droplets.
Adding a Layer of Shine and Protection (Waxing/Sealing)
Washing strips away some of the sacrificial layer of wax or sealant. Re-applying this protection is crucial. Think of wax as sunscreen for your car’s paint. It provides a barrier against UV rays, contaminants, and moisture.
- When to Wax: A good rule of thumb is to wax your car at least twice a year, though more frequent applications offer better protection.[31][32]
- Types of Protection:
- Spray Wax/Sealant: The quickest and easiest option. Simply spray onto the surface after drying and buff off with a clean microfiber towel. Perfect for a quick boost after a wash.
- Paste/Liquid Wax: Offers more durable protection (typically 2-4 months). Apply a thin, even layer to one panel at a time using a foam applicator pad. Let it haze, then buff off with a clean microfiber towel.
- Paint Sealant: A synthetic alternative to natural carnauba wax, sealants offer longer-lasting protection (often 4-6 months or more). The application process is similar to liquid wax.
Final Details: Glass and Trim
For a truly finished look, don’t forget the small details.
- Windows and Mirrors: Use a dedicated automotive glass cleaner, not a household ammonia-based product which can damage window tint.[33] Use two towels: one for applying the cleaner and a second, clean, dry one for the final buff to a streak-free shine.
- Tires and Trim: Applying a tire dressing not only gives your tires a rich, dark finish but also helps protect the rubber from drying out and cracking.[6] Use a non-slinging, water-based dressing for a clean look that won’t spray onto your paint. A trim restorer can be used on any faded black plastic trim to bring back its original color.
By properly drying your vehicle and reapplying a layer of protection, you lock in the shine and ensure your hard work lasts. Your car will not only be clean but also shielded from the very elements you just washed away.
Part 4: Common Mistakes, Pro Tips, and Your Car Wash Questions Answered
Even with the best intentions, it’s easy to fall into bad habits. This section is designed to be your quick-reference guide to avoid common pitfalls, learn some advanced tricks of the trade, and answer the most frequently asked questions about car washing.
Top 10 Car Washing Mistakes to Avoid
- Using Dish Soap: This is the most common and damaging mistake. Dish soap strips essential waxes and sealants, leaving your paint unprotected.[2][12][14]
- Washing in Direct Sunlight: This causes soap and water to dry too quickly, creating water spots and streaks that are hard to remove.[1][2][3]
- Using a Single Bucket: Dunking a dirty mitt back into your only bucket of soapy water turns it into a bucket of liquid sandpaper, grinding dirt back into your paint.[2][8][12]
- Using a Sponge or Old Rags: Sponges trap dirt against the surface, and old towels can be abrasive. Both are major culprits for causing swirl marks.[1][2][4]
- Washing in a Circular Motion: This creates noticeable, circular scratches (swirl marks). Always wash and dry in straight, overlapping lines.[3][10][17]
- Letting the Car Air Dry: This is a guaranteed way to get water spots from mineral deposits left behind after water evaporates.[1][19]
- Washing the Wheels Last: This often results in splashing abrasive brake dust and grime onto freshly cleaned paint panels.[4][26]
- Dropping Your Wash Mitt and Reusing It: If a mitt or towel touches the ground, it is now contaminated with grit. Do not use it on your paint again until it has been thoroughly machine-washed.
- Neglecting the Pre-Rinse: Scrubbing a dry, dirty car is the fastest way to scratch it. Always rinse thoroughly to remove loose debris first.[2][12]
- Using the Same Towel for Everything: Keep separate microfiber towels for washing, drying, glass, and wheels to prevent cross-contamination.[2]
Pro Tips from the Experts
- The Grit Guard Hack: When rinsing your mitt, scrub it directly against the grit guard in the rinse bucket. This action physically dislodges particles, making the process far more effective.[11]
- Foam Cannon Pre-Soak: For an even safer wash, use a foam cannon attached to a pressure washer. This covers the car in a thick layer of foam that helps to break down and lift dirt before you even touch the surface, providing extra lubrication for your wash mitt.[18]
- The Two-Towel Drying Method: Use one plush microfiber towel to absorb the bulk of the water, and a second, smaller waffle-weave towel to do a final pass and pick up any remaining streaks, especially on glass.
- Clean Your Tools: After every wash, clean your equipment. Machine wash your microfiber towels and mitts separately from other laundry, using a dedicated microfiber detergent and no fabric softener. Rinse your buckets and brushes thoroughly.
Frequently Asked Questions (FAQ)
1. How often should I wash my car?
As a general rule, washing your car every two weeks is recommended for a typical daily driver.[31][32][34] However, you should wash it more frequently if you live in an area with harsh conditions, such as near the ocean where salt is in the air or in regions where roads are salted in the winter.[31][34][35] You should also wash off contaminants like bird droppings and bug guts as soon as possible, as their acidity can damage paint.[36]
2. Is it better to hand wash my car or use an automatic car wash?
Hand washing using the proper two-bucket method is significantly safer for your car’s finish.[10][18] The large rotating brushes in many automatic car washes can be laden with dirt from previous cars, which can cause widespread scratching and swirl marks.[18]
3. Can I use a pressure washer to wash my car?
Yes, a pressure washer is a great tool, especially for the pre-rinse phase. However, use it with caution.[2][5] Keep the nozzle at a safe distance (at least one to two feet) from the paint and avoid using a very narrow, high-pressure stream, which could potentially damage trim or paint.[2][5]
4. What’s the difference between car wax and paint sealant?
Car wax is typically made from natural carnauba and provides a warm, deep shine but has a shorter lifespan (a few months). Paint sealant is fully synthetic, offers longer-lasting protection (4-6 months or more), and often produces a sharper, more reflective shine.
5. How do I remove stubborn bug splatters and tar?
First, try soaking the area with your car wash solution for a few minutes to soften them. If that doesn’t work, use a dedicated bug and tar remover. Apply the chemical, let it dwell for the recommended time to dissolve the contaminant, and then gently wipe it away before proceeding with your wash.[17]
6. Is it really necessary to clean the inside of my car too?
Absolutely. Cleaning the interior is just as important as the exterior.[31][34] Regularly vacuuming carpets and upholstery removes abrasive dirt that can wear down fibers, and cleaning surfaces prevents the buildup of dust and grime.[31]
7. What causes swirl marks and how can I fix them?
Swirl marks are microscopic scratches in the clear coat, almost always caused by improper washing and drying techniques (like using one bucket, a dirty sponge, or washing in circles).[28][37] While proper washing prevents new ones, removing existing swirl marks requires paint correction, which involves using a machine polisher and abrasive compounds to level the clear coat.
8. Can I just use household glass cleaner on my car windows?
It’s not recommended. Many household glass cleaners contain ammonia, which can damage tinted windows and dry out rubber seals. Always opt for an ammonia-free automotive glass cleaner.[33]
9. Why do my black or dark-colored cars show scratches so easily?
Dark colors don’t scratch more easily, but they show imperfections more prominently. The contrast between the dark paint and the light reflecting off the edges of a scratch makes them far more visible to the eye. This is why using a flawless washing technique is especially critical for dark-colored vehicles.[17]
10. What should I do if I see a bird dropping on my car?
Clean it off immediately! Bird droppings are highly acidic and can quickly begin to etch into your car’s clear coat, leaving a permanent mark. Use a quick detailer spray and a soft microfiber towel to gently lift the dropping off the surface.
Conclusion: Elevating Car Care from a Chore to a Craft
Washing your car the right way is about more than just appearances—it’s the most fundamental aspect of automotive preservation. By embracing the right techniques and tools, you are actively protecting your investment, preventing long-term damage, and maintaining the value and beauty of your vehicle.
We’ve journeyed from the critical preparations of choosing the right time and place, to assembling a professional-grade toolkit. We’ve mastered the step-by-step process centered around the scratch-preventing Two-Bucket Method, and we’ve put the finishing touches on with safe drying and essential protection. You are no longer just a car owner with a bucket and sponge; you are now an informed caretaker armed with the knowledge to achieve a truly flawless, professional-level finish.
The gleaming, swirl-free paint you see after following this guide is a direct reflection of the care and precision you’ve invested. It’s a satisfying result that no automatic car wash can ever replicate.
Ready to give your car the shine it deserves?
Gather your supplies, find a shady spot this weekend, and put these professional techniques into practice. Share your before-and-after results with us or ask any more questions you might have in the comments below. Happy washing

Tamim Hasan is the Founder and Lead Automotive Reviewer at RevivalCar.
With 5+ years of hands-on experience testing car accessories, tools, and
automotive gadgets, Tamim brings practical expertise to every review. His
mission is simple: help drivers find products that actually work through
real-world testing, not marketing hype.