Ever found yourself puzzled while trying to connect a battery charger? You’re not alone.
Many people face this challenge, especially when dealing with different types of batteries and chargers. Understanding how to connect a battery charger properly is crucial for maintaining the longevity and performance of your batteries, whether they’re for your car, motorcycle, or other devices.
Imagine the relief of knowing that you’re charging your batteries correctly every single time, without the worry of damaging them or dealing with unexpected failures. By mastering this simple yet essential skill, you can save time, money, and effort. In this guide, we’ll walk you through the steps in clear, straightforward language. By the end of it, you’ll be confident enough to tackle any battery charging situation with ease. Ready to empower yourself with this practical knowledge? Let’s dive in!
Safety Precautions
Safety is important when using a battery charger. Wear gloves to protect hands. Safety goggles keep eyes safe from sparks. Rubber-soled shoes prevent slips and falls. A long-sleeved shirt covers arms and skin. Avoid loose clothing near the charger.
Chargers can produce harmful gases. Fresh air helps keep you safe. Open windows and doors for good airflow. Never charge a battery in small, closed spaces. Outdoor spaces are best for charging. Avoid smoking near the battery charger. Use a fan if needed for extra air movement.
Gather Necessary Tools
There are different battery charger types. Each type is for different batteries. Most common are trickle chargers and smart chargers. Trickle chargers give power slowly to the battery. They help keep the battery charged. Smart chargers stop charging when the battery is full. These are safer for the battery.
Before starting, gather all necessary tools. You will need safety gloves and goggles. A screwdriver might be needed too. Always have a clean cloth nearby. Make sure to have the correct charger for your battery. Use cables that are not broken. Safety is important. Keep tools organized to work safely.
Identify Battery Type
Lead-Acid batteries are common in cars. They are heavy and reliable. Always check the battery label. It shows voltage and capacity. Use this info to pick the right charger. Connect red to positive. Black goes to negative. Be careful. Sparks can fly if mixed up.
These are found in phones and laptops. They are light and last long. Check the battery specs before charging. Overcharging can damage them. Use a charger with the right voltage. Match the amps too. Always unplug when fully charged.
Gel and AGM batteries are safe and spill-proof. They are used in boats and wheelchairs. Use a smart charger for them. This type adjusts the charge. It prevents overcharging and damage. Always check for proper connections. Red to positive, black to negative.

Credit: www.wikihow.com
Prepare The Battery
Before connecting a battery charger, ensure the battery is clean and dry. Check for damage or leaks. Securely attach the charger’s positive clamp to the battery’s positive terminal. Then, connect the negative clamp to the negative terminal. Double-check connections for safety and efficiency.
Clean Battery Terminals
Start by cleaning the battery terminals. Use a wire brush for this task. Dirt and corrosion can stop the charger from working. Make sure the terminals are clean and shiny. You can also use baking soda and water. Mix them to make a paste. Rub the paste on the terminals. Rinse with water and dry with a cloth. Clean terminals help the charger work better.
Inspect For Damage
Check the battery for any damage. Look for cracks or leaks. A damaged battery can be unsafe. If you see any damage, do not use the battery. Damaged batteries need replacement. Check the cables too. Make sure they are not frayed or broken. Good cables help in safe charging. Always handle the battery with care.
Connect The Charger
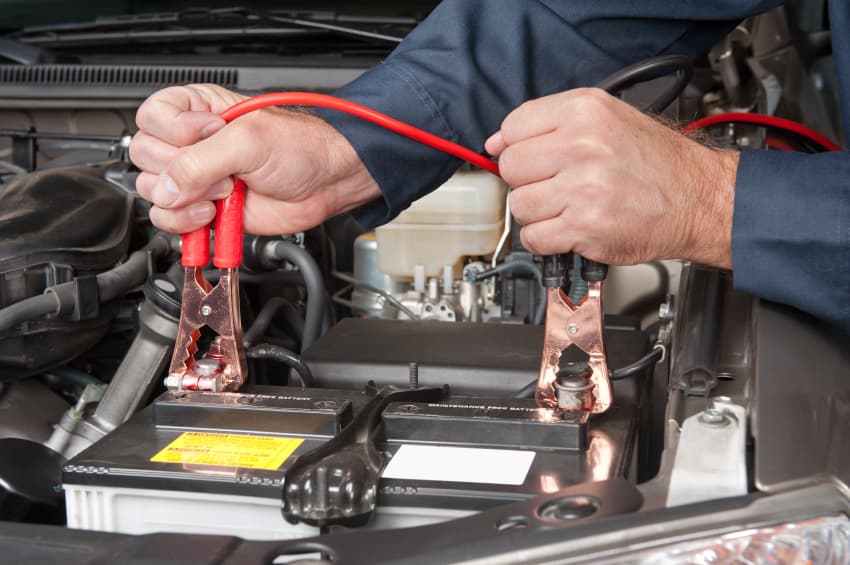
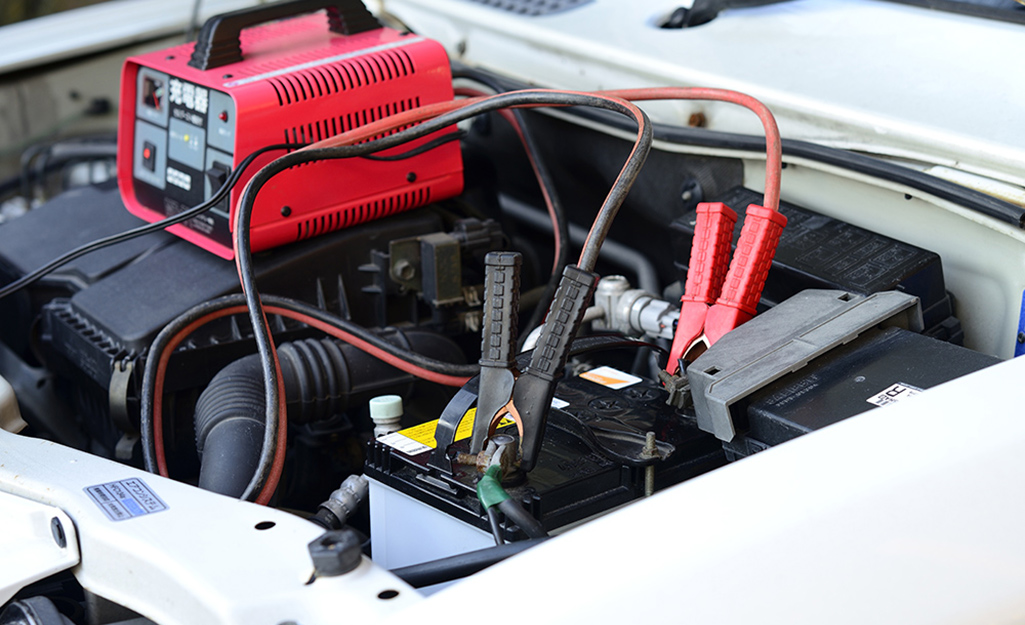
First, find the red cable on the charger. This is the positive cable. Connect it to the positive terminal of the battery. The positive terminal has a plus (+) sign. Make sure the connection is tight and secure. Loose connections can be dangerous.
Locate the black cable on the charger. This is the negative cable. Connect it to the negative terminal of the battery. Look for the minus (-) sign on the terminal. Ensure the connection is firm. This step is important for safety.
Before turning on the charger, check all connections. Ensure both cables are properly attached. There should be no loose wires. A good connection ensures the battery charges safely and efficiently. Double-check everything to avoid problems.
Set Charging Parameters
Choose the correct voltage for your battery. Most chargers have switches or buttons. Check your battery label for the voltage. Match it with the charger. Never set too high voltage. It can damage the battery. Always read the instructions on your charger. Safety first.
Understand the modes available. Some chargers offer fast and slow modes. Fast mode charges quickly but can heat the battery. Slow mode is safer for long battery life. Decide based on your needs. Check for additional modes like maintenance mode. Choose wisely for best results.
Monitor Charging Process
Charger indicators show the charging status. Green light means fully charged. Red or yellow light shows charging is ongoing. No light might mean a problem. Always check the manual for your charger. Some chargers beep when done. Listen for these sounds. This helps keep your battery safe.
Batteries can get hot while charging. Touch the battery carefully. It should feel warm, not hot. Too hot means something is wrong. Unplug the charger right away. Let the battery cool down. Check the charger settings if needed. Safety is important. Always charge in a cool place. Avoid direct sunlight or heat.

Credit: www.meineke.com
Disconnect The Charger
First, find the negative cable. It usually has a minus sign (-). Use a wrench to loosen the bolt. Pull the cable off the battery post. Make sure the cable doesn’t touch any metal parts. This keeps you safe from sparks.
Next, find the positive cable. It usually has a plus sign (+). Use the wrench again to loosen the bolt. Carefully lift the cable from the post. Keep this cable away from metal too. Now your battery is safe from connections.
Post-charging Maintenance
Inspect Battery Conditionregularly. Look for any signs of damage. Check for leaks or cracks. A damaged battery can be dangerous. Ensure terminals are clean and tight. Use a soft brush to clean them. Check the voltage with a multimeter. Ensure it matches the recommended levels. If not, consult a professional.
Store Charger Properlyafter use. Keep it in a dry place. Avoid areas with high humidity. Ensure the charger is away from heat sources. Wrap the cords neatly. This prevents damage. A well-stored charger lasts longer. It works better too. Label the charger. This helps identify it quickly.

Credit: www.homedepot.com
Frequently Asked Questions
Which Terminal Do You Connect First On A Battery Charger?
Connect the positive terminal first when using a battery charger. Attach the red cable to the battery’s positive post. Then, connect the negative terminal to the battery’s negative post or a grounded metal part. Always follow the manufacturer’s instructions for safety.
What Is The Correct Way To Connect A Battery Charger?
To connect a battery charger, first switch off the charger. Attach the positive cable to the battery’s positive terminal. Connect the negative cable to the negative terminal. Ensure connections are secure. Turn on the charger and monitor the charging process.
Disconnect when fully charged.
Do You Connect Red Or Black First On A Battery?
Connect the red cable first to the positive terminal of the battery. Then, connect the black cable to the negative terminal. Ensure both connections are secure for safe operation. This sequence minimizes the risk of short circuits and sparks during battery installation.
Which Battery Connector To Connect First?
Connect the positive battery terminal first. This helps prevent accidental short circuits. Ensure all connections are secure before starting the vehicle. Always wear safety gear and follow manufacturer guidelines for safety.
Conclusion
Connecting a battery charger is simple with the right steps. Always start by checking the charger’s instructions. Ensure the charger matches your battery type. Attach the red clamp to the positive terminal. Connect the black clamp to the negative terminal.
Double-check connections for safety. Set the charger to the correct settings. Turn the charger on and monitor the charging process. Disconnect safely once charging is complete. Regular practice makes the process easier. Follow these steps for efficient battery charging. Enjoy a fully charged battery and smooth device operation.
Stay safe and charge responsibly!
Hi I am Tamim Hasan, I am a normal person. I like to help people so I want to help you through the blog website. If anyone is benefiting through this blog website then you can help me by sharing comments.


