Are you ready to dive into the world of DIY mechanics? Assembling an engine stand might seem like a daunting task, but with the right guidance, you can master it with ease.
Imagine having the confidence to support and work on your engine safely and efficiently. By learning how to assemble an engine stand, you’re not only saving money but also gaining a valuable skill that empowers you in your automotive endeavors.
This guide will walk you through each step, ensuring you avoid common mistakes and achieve a perfect setup. Ready to get started? Let’s unlock the secrets to successfully assembling an engine stand, transforming your garage into a powerhouse of productivity.
Choosing The Right Engine Stand
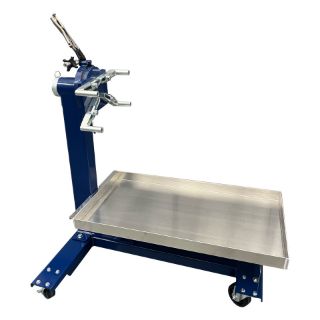
Engine stands come in different types. Adjustable stands can fit many engines. Fixed stands are strong but less flexible. Rotating stands can turn engines easily. Each type has pros and cons. Picking the right one is important. It depends on your needs. Think about what you need before buying.
Weight capacity tells how much the stand can hold. Some stands hold heavy engines. Others are for lighter engines. Knowing the weight capacity is crucial. It keeps your engine safe. Check the engine weight first. Then choose a stand that can hold it.
Good stands have useful features. Wheels make moving easy. Locking mechanisms keep engines safe. Adjustable arms fit different engines. Durable materials last longer. These features help in assembly. They make work easier and safer.
Gathering Necessary Tools And Materials
An engine stand needs some basic tools. A wrench set is important. You will need both metric and standard sizes. A socket set is also helpful. Screwdrivers are a must. Flathead and Phillips types are needed.
Safety is very important. Wear gloves to protect your hands. Use safety glasses to keep your eyes safe. Steel-toe boots are good for foot protection. Ear protection is needed if things get loud.
Some extra items make work easier. Rags can clean oil and dirt. A small flashlight helps see in dark spots. Zip ties can hold loose wires. A magnetic tray keeps small parts safe.
Preparing The Workspace
Remove everything from the workspace. This keeps the space safe. Keep the floor clean. No tools or parts should be lying around. A tidy area helps you work better.
Good light is important. It helps you see clearly. Use bright lamps or overhead lights. Shadows can hide tools or small parts. Make sure every corner is bright.
Keep all tools in one place. This way, you find them easily. Place parts in small boxes. Label each box clearly. Use a tool tray for quick access. Organized tools save time.
Unpacking And Inspecting Parts
Start by opening the box carefully. Find the parts list. Compare the list with what’s inside the box. Make sure all parts are there. Missing parts will cause problems later.
Look closely at each part. Check for any signs of damage. Scratches or dents can be a problem. Replace damaged parts before starting assembly.
Sort the parts. Group them by type. Bolts go together. Washers in another group. This makes assembly easier. Finding parts becomes quick and simple.
Assembling The Base
Start by laying out all the parts on the floor. Check that you have everything needed. Place the legs parallel on the ground. The legs must be straight. Align the holes for the bolts. This will help when securing later. Use a flat surface. This ensures everything is level.
Casters help the stand move easily. Attach the casters to the ends of the legs. Use a wrench to tighten the bolts firmly. Make sure they are secure. Do not leave them loose. Loose casters can make the stand wobbly. Double-check all bolts are tight.
Stability is very important. The engine is heavy. Use a level to check the base. It must be even. Adjust if needed. Tighten any loose parts. Test the stand by pushing it gently. It should not tip over. If it does, recheck your work.

Credit: www.youtube.com
Attaching The Upright Support
Begin by placing the upright support into the base. Ensure it fits securely. Then, tighten the bolts. This provides stability for the engine stand.
Aligning The Upright
Place the upright support in the middle. Make sure it is straight. Use a level tool for checking. Adjust until it looks perfectly straight. Take your time with this step. It is very important.
Securing With Bolts
Get the bolts ready. Slide them into the holes. Tighten them with a wrench. Check each bolt twice. Secure all bolts tightly. Loose bolts can be dangerous. Make sure everything is tight and secure.
Checking For Alignment
Look at the support from different angles. Make sure it’s still straight. Use the level tool again. Confirm the alignment once more. Everything should be aligned properly. A straight support is safe and strong.
Mounting The Rotating Assembly
Place the mounting plate carefully on the engine block. Ensure holes are aligned properly. Use a level to check alignment. This ensures the engine will rotate smoothly. Adjust the plate until it is perfect. Double-check everything before proceeding.
Gather the correct fasteners for the plate. Use bolts and nuts to secure it tightly. Make sure they are tight but not overly tightened. Check each bolt twice. Loose bolts can cause problems. Firmly secured bolts ensure safety.
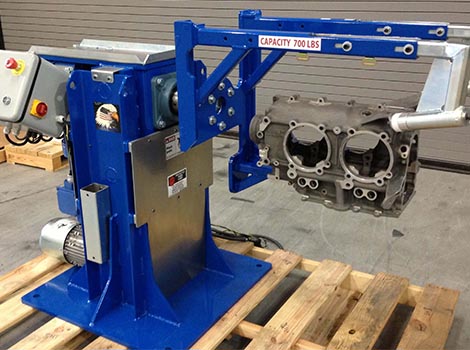
Test the rotation of the engine stand. Turn the handle to check movement. It should rotate freely and without obstruction. Listen for any strange noises. Check for smooth operation. Adjust if something feels off. Safety first, always.

Credit: roiindustries.com
Attaching The Engine Mount
Attaching the engine mount requires aligning it with the stand’s arms. Ensure bolts are tightened securely to hold the engine firmly. Verify stability by gently rocking the stand before proceeding with assembly.
Positioning The Mounting Arms
Begin by positioning the mounting armscarefully. Make sure they are evenly spaced. Check if they align with the engine holes. This ensures a proper fit. Make small adjustments if needed.
Adjusting For Engine Fit
Adjust the arms to match the engine size. Use a measuring tape for accuracy. Different engines might need different settings. Always re-check the fit before final tightening.
Tightening Bolts Securely
Secure the bolts to keep the engine safe. Use a wrench to tighten them firmly. Ensure each bolt is tight. Loose bolts can cause accidents. Double-check each bolt before proceeding.
Safety Checks And Final Adjustments
Loose bolts can cause accidents. Always check each bolt. Turn them with a wrench. They should be tight. Never ignore a loose bolt. It can be dangerous.
Push the stand gently. It should not move. Stand stability keeps the engine safe. If it wobbles, fix it. Look for uneven floors. Adjust the stand legs. Make sure all parts fit correctly.
Spread the weight evenly. Balanced weight is key. Too much weight on one side is bad. Check with a level tool. Adjust the stand if needed. Keep the engine centered. This helps prevent tipping.
Tips For Safe Engine Mounting
Always use correct lifting tools. These tools keep you safe. Avoid using just your back. Use your legs to lift. Keep the engine close to your body. This helps balance the weight. Lift slowly to avoid sudden moves. Moving too fast can cause injury.
Place the engine in the center of the stand. This prevents tipping. Use a level surface for alignment. Check the bolts. They must be tight. Loose bolts can cause problems. Double-check your work. Ensuring proper alignment is key.
Always use support straps for extra safety. Straps keep the engine secure. They prevent slipping. Wrap them around the engine. Tighten until snug. Ensure straps don’t have cuts. Damaged straps can break. Check them often. Safety is always first.

Credit: www.hrpracing.com
Frequently Asked Questions
How To Attach An Engine To An Engine Stand?
Position the engine stand near the engine. Align the stand’s arms with the engine’s bolt holes. Secure the engine using bolts. Ensure all bolts are tightened properly. Carefully lift the engine onto the stand using a hoist. Double-check stability before proceeding with any work.
How To Assemble The Engine Step By Step?
Begin by cleaning all engine parts thoroughly. Install the crankshaft, followed by pistons and rods. Attach the cylinder head and secure the camshaft. Fit the timing belt or chain, then the intake and exhaust manifolds. Finally, install the engine into the vehicle and connect all necessary components.
Is A 1000 Pound Engine Stand Enough?
A 1000-pound engine stand usually supports most small to medium engines. Always check your engine’s weight before use. Ensure the stand’s compatibility with your specific engine model for safety. Proper assembly and usage are crucial to prevent accidents. Consult the manufacturer’s guidelines for best practices and weight limits.
What Bolts Are Needed For An Engine Stand?
Use Grade 8 bolts for an engine stand. Typically, 3/8-inch or 7/16-inch bolts are suitable. Ensure they match the engine’s mounting holes. Always check the engine stand’s manual for specific bolt requirements. Proper bolt fitment ensures stability and safety during engine work.
Conclusion
Assembling an engine stand is straightforward with clear steps. Focus on safety and stability. Follow the instructions closely for best results. Proper assembly ensures your engine stand is ready for use. This makes engine work easier and safer. With these tips, you can confidently set up your stand.
Ensure all parts are securely tightened. Your engine stand is now ready for various tasks. Handling engines becomes less stressful. Enjoy the ease of having your engine stand assembled and ready. Thank you for reading. Your projects will be smoother with this stand in place.
Hi I am Tamim Hasan, I am a normal person. I like to help people so I want to help you through the blog website. If anyone is benefiting through this blog website then you can help me by sharing comments.


